
This post may include affiliate links.
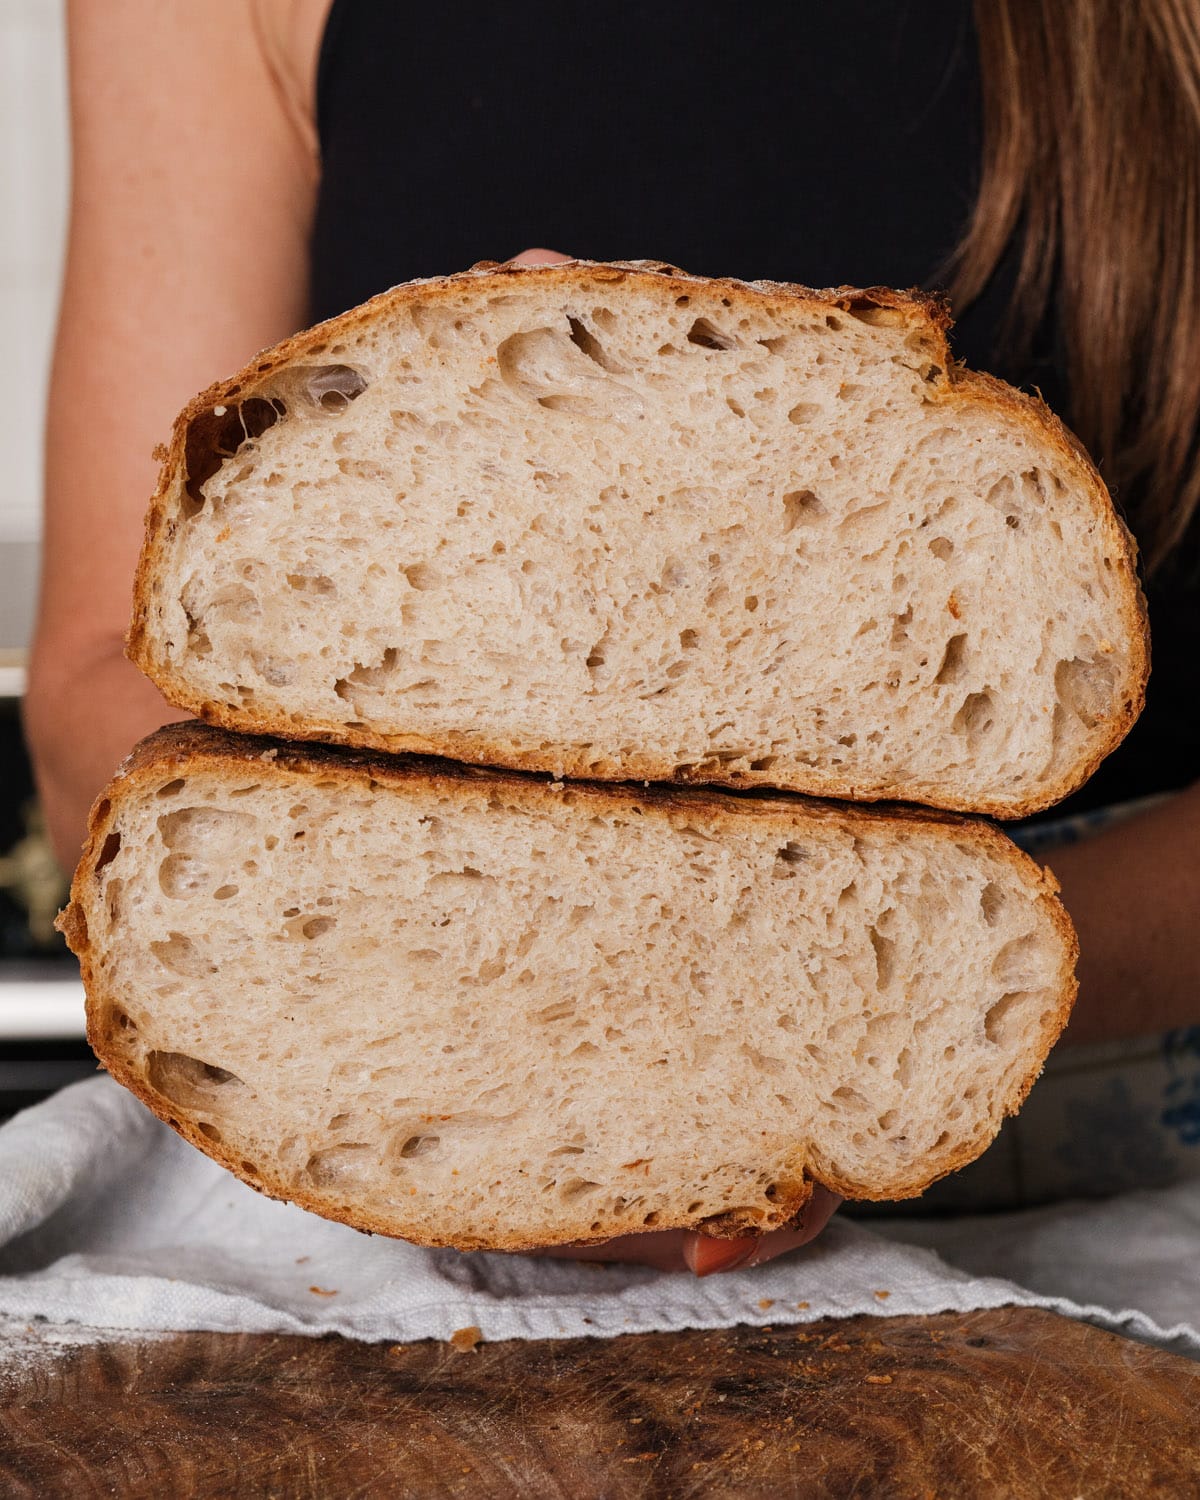
This easy sourdough bread recipe is foolproof for beginners and so much easier than most loaves! It comes out with the perfect chewy crust and tender crumb.
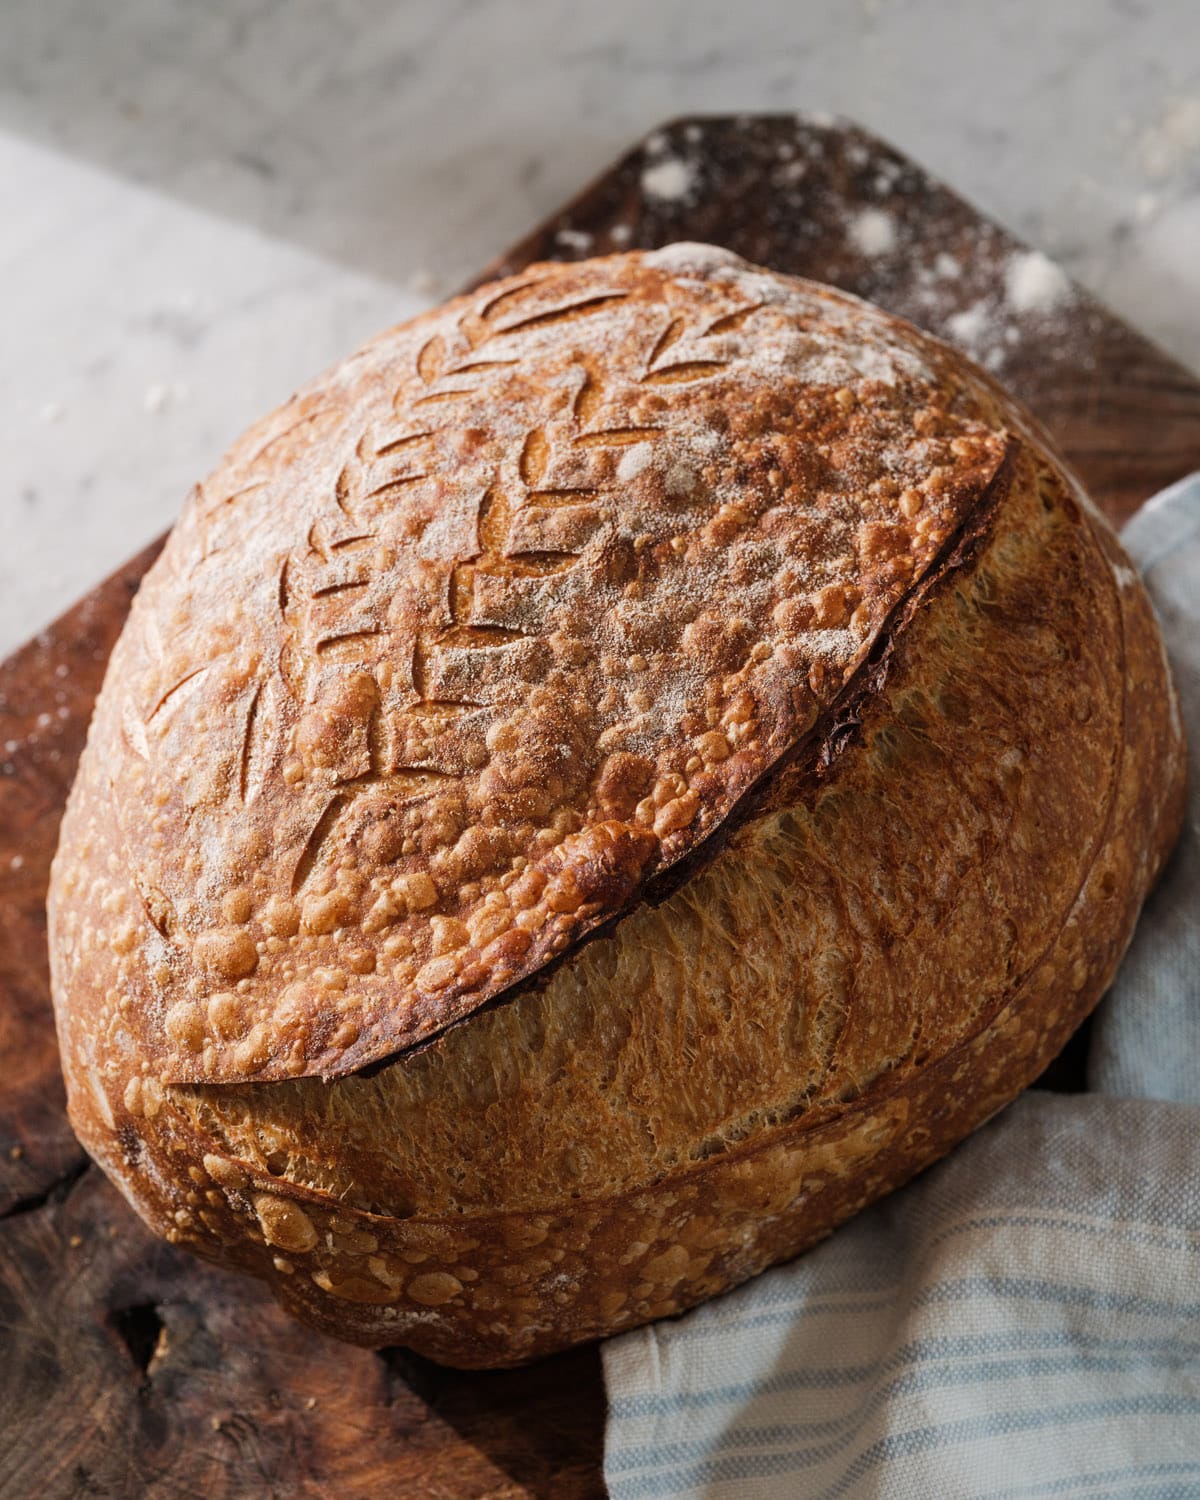
As a cookbook author, over the years I’ve also become a loud homemade bread enthusiast, with bread recipes in each of my three books from artisan bread to focaccia. I’m also a busy mom and I think homemade bread should be accessible to everyone. Years ago I used to make sourdough bread, but after having kids it became too hard to fit into my life.
So with the help of my husband Alex, I’ve created this new recipe that’s easy to memorize, works with some simple stretch and fold sessions, and tastes better than anything I’ve ever had in a bakery. My entire family is obsessed. I’m so excited to share my new Actually Easy Sourdough Bread recipe!
Why This Is the Easiest Sourdough Bread Recipe
There are so many recipes out there claiming to be “easy sourdough bread!” and “sourdough for beginners!” Here’s why this one is actually easy:
Recipe highlights:
- 3 easy stretch-and-fold sessions
- Recipe is easy to memorize
- Dough is easy to work with
- About 30 minutes of hands-on work, then hands-off overnight rest in the fridge
- Beginner-tested (and kid-approved!)
How it works? For this easy sourdough recipe I’ve added 10 grams each honey and olive oil. The olive oil coats the gluten strands, which makes the dough very easy to handle, and it bakes into a more tender crumb. The honey gives the sourdough starter a little more food which gives it a more predictable rise, and helps the crust brown. It also adds a nice balanced flavor, making the bread perfect for sandwiches and toast.
5-Star Reader Review
⭐⭐⭐⭐⭐ “I made the bread and it looks and smells amazing! After tasting it I LOVE THE FLAVOR. The addition of honey and oil really helps with the overall dough texture. I also found the hour-long breaks between folds and stretches made the dough very easy to handle. This is my new favorite sourdough recipe, so this is what I will use going forward!” -Tanvee
Video: Watch Me Make Easy Sourdough Bread
The most important thing when learning to bake bread is watching it! Here I’ve pulled in my husband Alex, a sourdough bread expert, to show you exactly how to mix, shape, and bake the dough. Watch this video before you go about making this bread!
Before You Start: Feeding Your Sourdough Starter
This recipe calls for 100 grams of ripe, 100% hydration sourdough starter at its peak. What does that mean, and how do you get it?
- Peak means you fed it 4 to 8 hours before. It should be doubled and have bubbles throughout and small sour (but pleasantly so).
- Here’s my scheduling trick: Feed the starter 4 to 8 hours before you plan to mix up the bread. If you’re new to this, see my guides on how to make sourdough starter and how to feed sourdough starter.
Equipment You’ll Need
Here’s each tool you’ll need (reference the video to see me talk about each tool in detail):
Required Tools
- Kitchen scale: This is a non-negotiable! When baking bread, using grams is essential because if you measure in cups the weight is variable. Don’t skip this!
- Dutch oven: Baking sourdough bread in a Dutch oven traps the steam that comes off of the dough, which gives you a bakery-style rise and that beautiful blistering on the crust. My trick is to add an ice cube for the initial bake, which adds even more steam! You’ll remove the bread after 17 minutes and bake directly on the oven rack for the remaining time.
- Banneton: This sourdough bread is a wet dough (about 77% hydration), so placing it into a basket (banneton) helps it hold its shape overnight. If you don’t have one, you can use a medium bowl lined with a floured tea towel.
- Lame or sharp knife: You’ll need to score the bread before baking it, which gives the loaf a place to expand while it rises in the oven. I like using a lame because it’s so sharp and precise, but a sharp knife works too.
- Instant-read thermometer: This is so you can check the internal temperature of the bread when baking: you’ll want it at 205°F inside.
Optional Items
- Oven gloves or hot pads: Optional, but these gloves make things easy.
- Shower cap or plastic wrap: A fun tip: I like using a disposable shower cap to cover my bowl! It makes it easy and you can reuse it many times.
- Bread bag or towel: Also optional, but it’s a little easier to store in a bag.
- Dough whisk or wooden spoon: I love how this dough whisk makes the stirring process easy.
The Easy Sourdough Baking Schedule
Here’s an example of a baking schedule for this easy sourdough bread. I work from home so I can also fit this into breaks during the work day, but if you don’t you can bake it up easily on the weekend. Here’s a breakdown:
Day 1
| What To Do | Timing |
|---|---|
| Feed the starter | 4 to 8 hours before mixing (day of or night before) |
| Mix the dough; cover and rest | 1 hour |
| Stretch and fold #1; rest | 1 hour |
| Stretch and fold #2; rest | 1 hour |
| Stretch and fold #3; rest | 2 to 3 hours |
| Shape, place in banneton, refrigerate overnight | 12 to 18 hours |
Day 2
| What To Do | Timing |
|---|---|
| Preheat the Dutch oven | 30 minutes |
| Score and bake | 40 min |
| Cool completely | 1 hour |
Step-by-Step: The Stretch and Fold Method
The main part of this easy sourdough bread recipe that requires some technique is the stretching and folding. This process replaces kneading, and it’s very easy to do.
The best place to start here is watching the video of Alex showing you what to do. Essentially you’ll want to wet your hands so they don’t stick to the dough, then grab one edge of the dough, stretch it up, and fold it over the center. Then you’ll give the bowl a quarter turn and repeat all the way around. After that, you’ll lift the dough and stretch it around itself so that a boule (ball shape) forms.
Here’s what the dough looks like after each stage:
- After mixing: It should look shaggy and sticky.
- After the first stretch: The dough should be smoother and springier.
- After the second and third stretches: At this point, the dough holds the ball shape and should start to have bubbles on the top.
Shaping The Dough and Scoring
Once you’ve gone through the stretches and folds, the only other part with some finesse is shaping the loaf and scoring it! Here’s the basic process (and again, reference the video for both shaping and scoring):
- Fold the four corners of the dough into a packet. Then flip it seam-side down, and drag it toward you on the counter several times to build surface tension and make a loaf shape.
- Flip the dough seam-side up into the floured banneton.
- After the overnight rest, turn it out onto parchment paper. Cut one long 1/2-inch deep slit at a slight angle with a lame or sharp knife.
Tips For Baking This Easy Sourdough Bread
Once it’s shaped, it’s time to bake! Reference the recipe below for the specifics, but here’s what to know:
- Preheat your Dutch oven for 30 minutes. You’ll want it blazing hot before you add the bread.
- Add ice cube for the initial bake in the Dutch oven. This adds even more steam, which makes for the perfect rise and crispy crust.
- Be careful when removing the loaf from the Dutch oven for the final bake. I use oven gloves when removing the loaf. As an extra precaution, I place my hot Dutch oven on the stovetop and then add a bunch of hot pads on top as a sign to everyone in my family: do not touch, this is hot!
How to Store Sourdough Bread
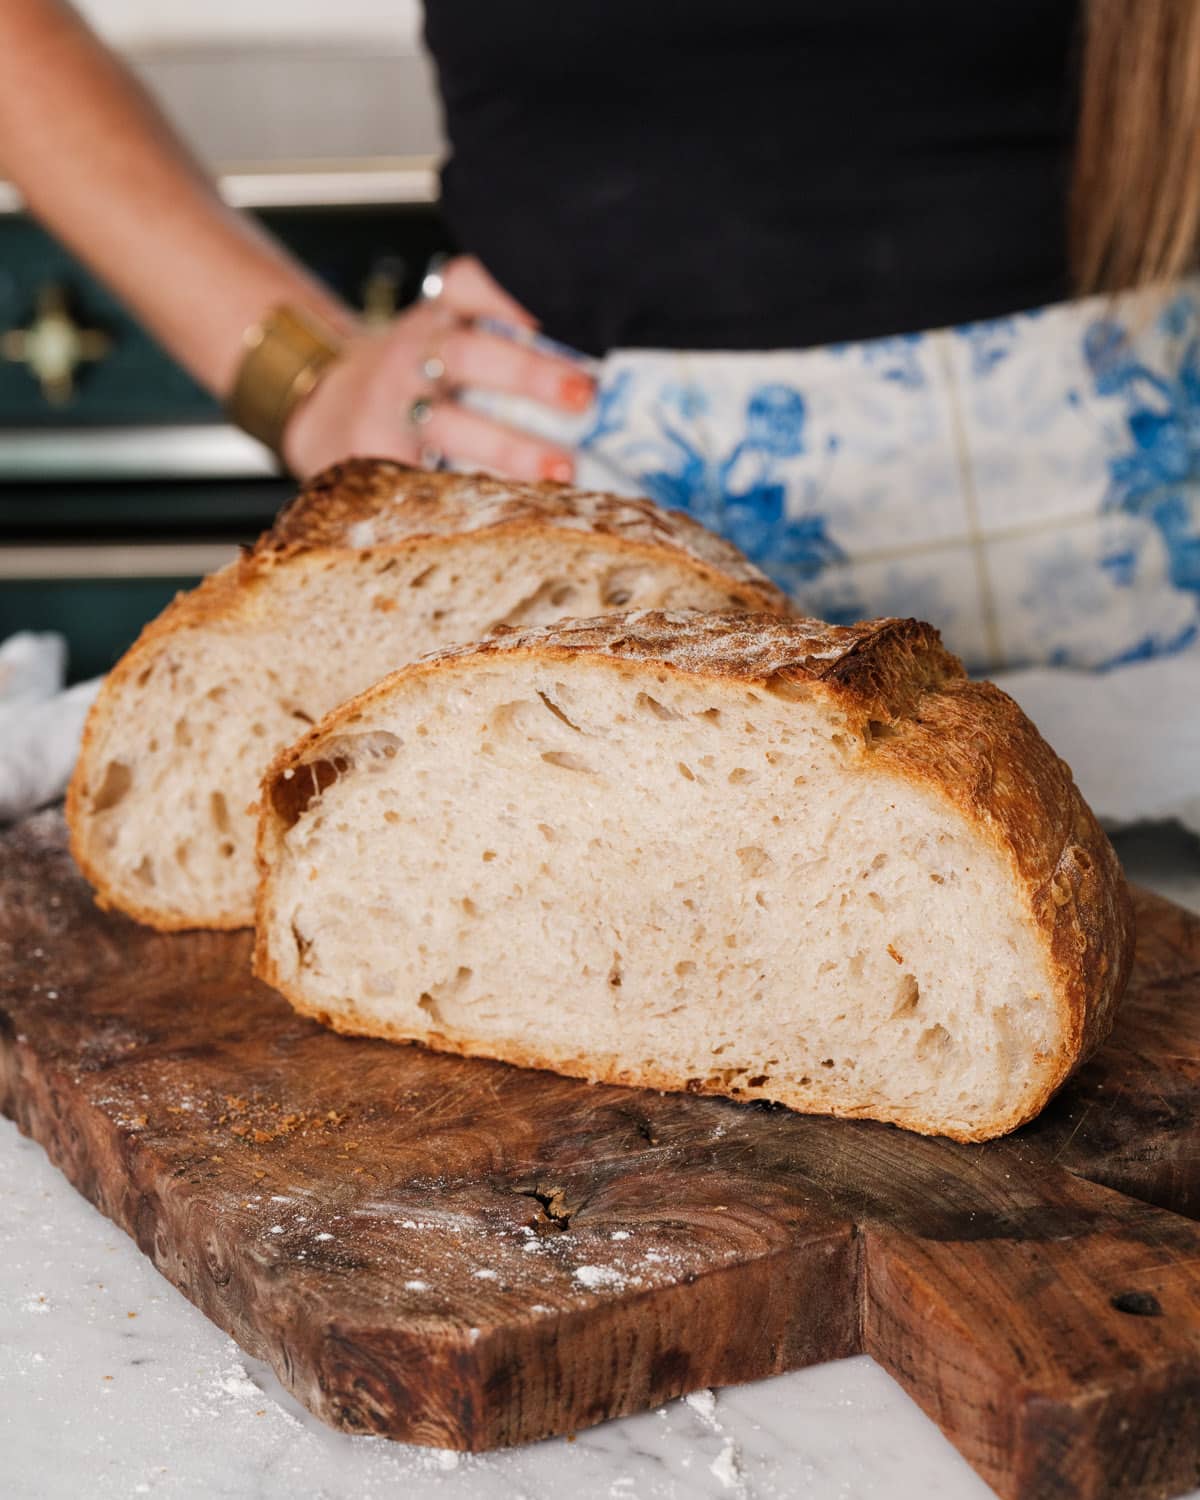
The most important part about sourdough is cooling and storage! Let the loaf cool completely before slicing, about 1 hour. Cutting into warm sourdough makes the crumb get gummy. After that:
- Days 1 to 2: Store the bread in a towel or linen bread bag at room temperature. Do not store it in plastic (it gets soft and gummy) or refrigerated (it gets stale).
- To freeze: Slice the loaf, then add the slices to a bag with the air pressed out and freeze up to 3 months. You can toast slices right from frozen.
Ways to Serve This Sourdough Bread
This sourdough bread recipe tastes absolutely incredible in so many ways:
- With peanut butter, honey and a sprinkle of sea salt
- Toasted with salted butter
- With avocado toast toppings
- On any sandwich, like pesto sandwich or burrata sandwich
- With cozy white bean soup or wild rice soup
- Dipped into whipped feta or classic hummus
You can also use up stale bread in homemade croutons, panzanella, ribollita, or sourdough French toast.
Prefer A Classic Sourdough Bread?
My classic sourdough bread recipe is a more traditional method with no honey or olive oil, more hands-on technique, and a printable checklist.
Dietary Notes
This easy sourdough bread recipe is vegetarian and dairy-free, and fits the Mediterranean diet. For vegan, use agave syrup in place of the honey.
Easy Sourdough Bread Recipe (Really!)
This easy sourdough bread recipe is foolproof for beginners and so much easier than most loaves! It comes out with the perfect chewy crust and tender crumb.
- Prep Time: 6 hours
- Rest Time: 12 to 18 hours
- Cook Time: 40 minutes
- Total Time: 0 hours
- Yield: 1 loaf (about 12 slices) 1x
- Category: Bread
- Method: Baked
- Cuisine: American
- Diet: Mediterranean Diet, Vegan, Vegetarian
Ingredients
- 100 grams ripe sourdough starter (100% hydration), at its peak
- 315 grams warm water
- 12 grams kosher salt
- 10 grams olive oil
- 10 grams honey (or agave syrup for vegan)
- 350 grams bread flour
- 75 grams whole wheat flour
- 50/50 gluten-free flour, optional, for dusting
Instructions
Day 1 (5 to 6 hours, mostly hands off)
Before you start, make sure your sourdough starter is at its peak; see How to Feed a Starter.
- Mix the dough and rest 1 hour: In a large bowl, stir together the sourdough starter, warm water, honey, olive oil and salt. Add the whole wheat flour and bread flour, then stir until a shaggy dough forms. Cover and rest 1 hour.
- Stretch 1 and rest 1 hour: With wet hands, grab one edge of the dough, stretch it up, and fold it over the center. Rotate the bowl and repeat until you’ve worked your way around the dough. Pick up the dough and continue stretching and folding, several more times until a tight boule is formed. (See the video for how to fold the dough.) Place back in the bowl, cover with plastic (or I use a reusable shower cap!) and rest 1 hour.
- Stretch 2 and rest 1 hour: With wet hands, grab one edge of the dough, stretch it up, and fold it over the center. Rotate the bowl and repeat until you’ve worked your way around the dough. Pick up the dough and continue stretching and folding, several more times until a tight boule is formed. (See the video for how to fold the dough.) Place back in the bowl, cover and rest 1 hour.
- Stretch 3 and rest 2 to 3 hours: With wet hands, grab one edge of the dough, stretch it up, and fold it over the center. Rotate the bowl and repeat until you’ve worked your way around the dough. Pick up the dough and continue stretching and folding, several more times until a tight boule is formed. Place back in the bowl, cover. Rest 2 to 3 hours, until doubled in size and very jiggly on top when the bowl is shaken. (See the video for what it should look like.)
- Shape the bread: Prepare a counter lightly dusted with flour. Prepare a banneton dusted with flour or 50/50 GF flour. Carefully scrape the dough onto the counter. Gently stretch each corner up and over the center to form a packet, then flip the dough over and place your hands behind the dough and gently pull the dough towards you to increase the tension on the surface of the dough. Rotate and repeat until you have a tight boule shape. Carefully flip into the banneton (the dough will stretch to fill the banneton as it rests).
- Cold ferment 12 hours: Cover the banneton and refrigerate overnight, 12-18 hours.
Day 2 (30 minutes preheat + 40 minute bake)
- Preheat the Dutch oven: When ready to bake, position a rack in the center of the oven. Place a Dutch oven with lid on in the oven, and preheat the oven to 515°F for at least 30 minutes.
- Bake 17 minutes in Dutch oven: Once preheated, prepare a square of parchment on the counter, along with an ice cube and lame or sharp knife. Remove the banneton from the fridge, and gently flip the bread onto the parchment paper. Use a sharp knife to cut a long 1/2-inch deep slit at a slight angle across the top of the bread. Remove the lid from the preheated Dutch oven and carefully pick up the parchment paper and drop the boule into the Dutch oven. Drop the ice cube into the side of the dutch oven, then quickly place the lid on and bake for 17 minutes.
- Reduce heat and bake 22-24 minutes on rack: After 17 minutes, reduce the heat to 400F. Remove the dutch oven from the oven. Carefully lift bread out and place it directly on the oven rack and bake for 22-24 minutes until the bread is a dark golden brown and the internal temperature is at least 205°F [95°C] when measured with a food thermometer.
- Cool: Remove the bread from the oven and place it on a baking rack until fully cool, about 1 hour (don’t cut it while warm or it will become gummy). After cooling, the bread is ready to eat. Store the bread wrapped in cloth or in a bread bag on the counter for up to 2 days, or slice and freeze wrapped in foil in a plastic bag for 3 months. Toast slices directly from frozen. Do not store the bread in plastic, or it will lose its texture.
Notes
Flour substitutions: Bread flour is essential in this recipe; don’t substitute it with more all-purpose flour.
Banneton alternatives: If you don’t have a banneton, you can proof the dough in a bowl lined with a well-floured tea towel.
Hydration level: This is a 77% hydration dough, which creates that nice balance of manageable handling with good open crumb.
Timing flexibility: If you need to adjust the schedule, you can leave the dough in the refrigerator for up to 18 hours (longer than that and it may overproof). You can also feed your starter earlier or later: just make sure it’s at peak activity (bubbly and doubled) before using it.