This post may include affiliate links; see our disclosure policy.

If you’ve been following our blog this summer, you probably caught the first couple hints about our new house around mid-May. We weren’t necessarily house shopping, just keeping half an eye on any new listings in the neighborhood — when a house popped up just a few blocks away from our (old) house that we just couldn’t resist. Tons of charm, plenty of space, and a kitchen just begging to be remodeled.
Living in a beautiful 1920’s neighborhood in Indianapolis has plenty of perks, but large kitchens (and decent-sized closets) come few and far between. It didn’t take us long to decide that the possibility of remodeling a kitchen, while staying in a location within walking distance of our favorite locales, was too good of a opportunity to pass on.
We had 6 weeks before closing to design our perfect kitchen. Of course, perfect meant stylish, functional, and most importantly, within our budget. This was a tough 6 weeks. Sonja would pin items to our Pinterest boards feverishly every single night. Meanwhile, I would try to find the cost of the “in real life” items that she was pinning. It was a LOT harder than we would have ever expected. Designing a kitchen without being in the space, without seeing many of the items before purchasing them (like cabinets), and staying within our budget was tough! I can’t even count how many decisions were required for us to make. We had more than a few “what have we gotten ourselves into” and “NEVER doing this again” ‘s, but we survived. And we love the final result.
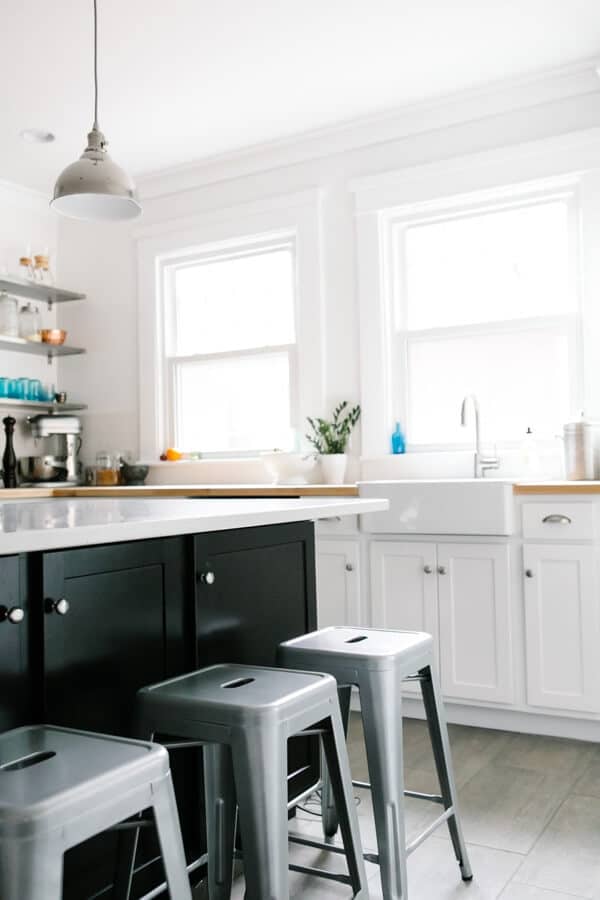
We are having so much fun with a big island, two sinks, lots of windows, and a wide open room. It’s pretty much a home cook’s dream! Here are a few before-and-after pictures, and a gallery of the finished kitchen. Thanks for cheering us on during the process — we can’t to develop new recipes for you from our new space!
A few detailed notes about the project for those of you that like this sort of thing:
- We sealed off a door just to the left of the two windows in the kitchen. This allowed us to put in a ton more counter space.
- We widened the door from the kitchen to the dining room.
- We refinished the painted floor in the dining room to the original 90-year old maple floor.
The Finished Product (see below for Before + After shots)
Wondering about our inspirations while designing the kitchen? Check out our Pinterest board. After gathering enough images, we realized that the butcher block / white shaker cabinet / subway tile style is what we are drawn towards. In particular, we were strongly inspired by the cabin renovation that Sarah from Smitten Studio has been sharing on her blog.

Before / After
Before / After
Before / After
Before / After
Before / After
Before / After
Before / After
Before / After
In Our New Space
Let us know if you have any questions, or kitchen design stories to share – we love hearing them, especially now that we’re on the other side. We’d like to thank our the contractor, Matt Troyer and Emergent Investments, for all of their hard work making it happen. And, thanks again for all your support through this process!
Here’s a list of the main components we ended up deciding on. We wouldn’t have been able to design our kitchen without all the bloggers who’ve shared their renovations before us!
Cabinets — Aristokraft Benton in a White Finish
Floors — Stark Tortora from The Tile Shop
Island Countertop — Caeserstone London Grey
Outside Countertops — IKEA Beech Numerar Butcher Block
Open Shelves — IKEA Ekby Mossby
Pendant Lights — Pottery Barn Classic Pendant
Stools — Tabouret Stools from Overstock


Great Post! Thank you for providing some great information and ideas to your readers. Please keep sharing.
I love the kitchen it turned out to be after renovation. I looks so good and plus a whole lots more spacious.