
This post may include affiliate links; see our disclosure policy.
Cooking pizza on a stone makes the perfect crispy-chewy pizza crust! I’m sharing my years of testing to help you get pizzeria-quality results using a pizza stone in your home oven.

After a decade of testing pizza recipes and multiple trips to Italy, I’ve realized there’s one tool you need to make next-level pizza in a home oven: a pizza stone! I’ll admit it, even after years of experience I still get a little nervous transferring my dough to the blazing hot stone.
But here’s the thing: using a pizza stone is the only way to achieve that perfect crispy on the outside, chewy on the inside pizza crust. Outdoor pizza ovens are expensive, so at around $35, a pizza stone is a steal for a homemade margherita pizza that tastes like it’s straight out of Naples!
Why Cooking Pizza on a Stone Works
Ever wondered why pizzeria pizza has that signature snap while homemade pizza crust can taste dense and soft? The answer lies in moisture and temperature. Home ovens trap steam, which is the enemy of a crisp crust. Home ovens also only reach 500°F, whereas wood-fired ovens can reach temperatures of 900°F to 1000°F.
A pizza stone is porous. When you add homemade pizza dough onto a blazing hot surface, the stone absorbs moisture from the dough while simultaneously blasting it with stored heat. This creates the “leoparding” (charred spots) on the bottom of the crust. It turns your home oven into something more like an outdoor pizza oven.

What’s The Best Pizza Stone?
I use this pizza stone, and it’s held up very well over the years. Just make sure never to place a cold pizza stone in a hot oven or to submerge it in water. Minimize movement and handling of the stone and only transport it when it is room temperature.
Preheat, Then Preheat More
One mistake I see home cooks make with a pizza stone not preheating long enough. Ceramic takes a long time to absorb heat. I recommend placing your stone in a cold oven and then setting the temperature as high as it will go (usually 500°F or 550°F).
Once the oven hits that temperature, let it sit for at least another 30 to 45 minutes. You want that stone saturated with heat so that when you add the cold dough, it doesn’t lose temperature.
Important tip: Never add a cold pizza stone to a preheated oven because the pizza stone will crack.
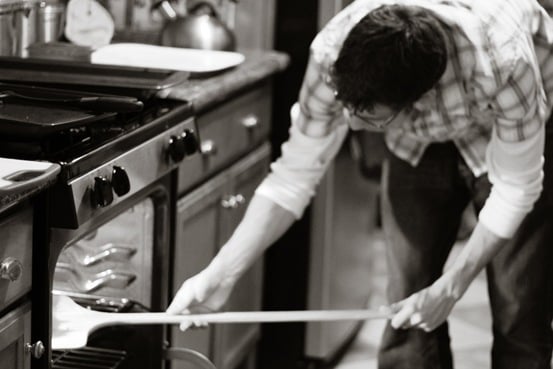
Tips for The Transfer
Getting the pizza from the counter to the stone is the part that scares most people (including me!). You need a pizza peel for this. If you don’t have one, a rimless baking sheet can work in a pinch, but a peel is worth the investment.
I like this standard pizza peel, but my actual favorite pizza peel is this conveyor pizza peel. It makes it so easy to slide the pizza right onto the stone (though it’s a bit more expensive).
To prevent sticking, I use semolina flour on the peel rather than cornmeal. Cornmeal can burn and smoke at high temperatures, whereas semolina does not and helps the dough slide right off.
Important tip: Do the “shimmy” test before topping. Before you add toppings like pizza sauce or cheese, give the peel a gentle shake. If the dough slides freely, you can add toppings. If it sticks, lift up the edge of the dough and toss a little more semolina flour underneath.
How to Cook a Pizza on a Stone: Step-by-Step
Ready to bake? Here is my workflow for the perfect pie:
- Position Rack: Place a rack in the center of the oven. Place the pizza stone on the rack.
- Preheat the Stone: Turn your oven to its highest setting (500°F or higher) and let the stone heat up for at least 45 to 60 minutes.
- Prep the Pizza: Stretch your dough on a peel dusted with semolina flour. Add your pizza toppings, but go light! Heavy toppings can make it harder to slide.
- Transfer: Open the oven door and place the tip of the peel near the back of the stone. With a confident, quick motion, jerk the peel back so the pizza slides onto the stone. (If you’re using a conveyor peel, gently pull back the conveyor.)
- Bake: Bake for 5 to 7 minutes.
- Cool: Use the peel to remove the pizza: in a quick motion, slide the peel under the pizza, then remove it from the oven. (For the conveyor, gently pull out the pizza using the conveyor). Let it rest on a wire rack for a minute so the steam can escape.
Caring for Your Stone
One thing you need to know: that pizza stone is going to get ugly. That’s a good thing: a well-used stone should look dark and spotted.
To clean a pizza stone, never use soap. Because it is porous, it will absorb the soap which can affect the flavor. For a full guide on maintenance, check out my post on How to Clean a Pizza Stone. Generally, bringing it to room temperature, scraping off burnt bits, and wiping it with a damp cloth is all you need.
Troubleshooting Common Issues
- My pizza got stuck to the peel: Try lifting the edge and adding a handful of semolina flour under the stuck spot.
- My stone cracked: This happens to the best of us: I’ve gone through several pizza stones! Pizza stones crack usually due to “thermal shock.” Never put a cold stone in a hot oven! Always let it heat up and cool down with the oven. Also never put a pizza stone on a grill (I’ve also tried this, and it immediately broke).
- The toppings are burning but the crust is not cooked: This usually means the stone wasn’t hot enough. Next time, preheat longer!
Best Pizza on a Pizza Stone

Here’s how to make pizza on a pizza stone! This homemade pizza dough baking on a blazing hot stone makes restaurant-quality results.
- Prep Time: 15 minutes
- Rest Time: 45 minutes
- Cook Time: 7 minutes
- Total Time: 1 hour 7 minutes
- Yield: 1 pizza 1x
- Category: Pizza
- Method: Baked
- Cuisine: Italian
- Diet: Vegetarian
Ingredients
- 1 ball Homemade Pizza Dough*
- ⅓ cup Easy Pizza Sauce**
- 2 to 3 ounces fresh mozzarella cheese (or about ¾ cup shredded mozzarella)
- Parmesan cheese, for topping (optional)
- Kosher salt
- 2 basil leaves
- Semolina flour or cornmeal, for dusting the pizza peel
Instructions
- Make the Dough: Make my Homemade Pizza Dough recipe.
- Position Rack: Place a rack in the center of the oven. Place the pizza stone on the rack.
- Preheat the Stone: Turn your oven to its highest setting (500°F or higher) and let the stone heat up for at least 45 to 60 minutes.
- Prep the Toppings: Slice the mozzarella into ¼ inch thick pieces. If it’s watery (all brands vary), allow it to sit on a paper towel for 15 minutes, then dab the mozzarella with the paper towel to remove any additional moisture.
- Prep the Pizza: Stretch your dough and place it on a peel dusted with semolina flour (see How to Stretch Pizza Dough). Spread the pizza sauce across the dough. Top with the mozzarella cheese. Add a thin layer of fresh grated Parmesan cheese and a few pinches of kosher salt.
- Transfer: Open the oven door and place the tip of the peel near the back of the stone. With a confident, quick motion, jerk the peel back so the pizza slides onto the stone. (If you’re using a conveyor peel, gently pull back the conveyor.)
- Bake: Bake for 5 to 7 minutes.
- Cool: Use the peel to remove the pizza: in a quick motion, slide the peel under the pizza, then remove it from the oven. (For the conveyor, gently pull out the pizza using the conveyor.) Let it rest on a wire rack for a minute so the steam can escape. Add the basil leaves, slice into pieces, and serve.

